Paper cup machine rim curling station troubleshooting should start from the shape of the defect and the point in the cycle where it is created. A weak, split, uneven or eccentric rim can originate in the incoming sidewall blank, cup-body geometry, tooling condition, cup support, forming sequence or an earlier station. Changing a roller position before identifying that chain can move the defect without removing its cause.
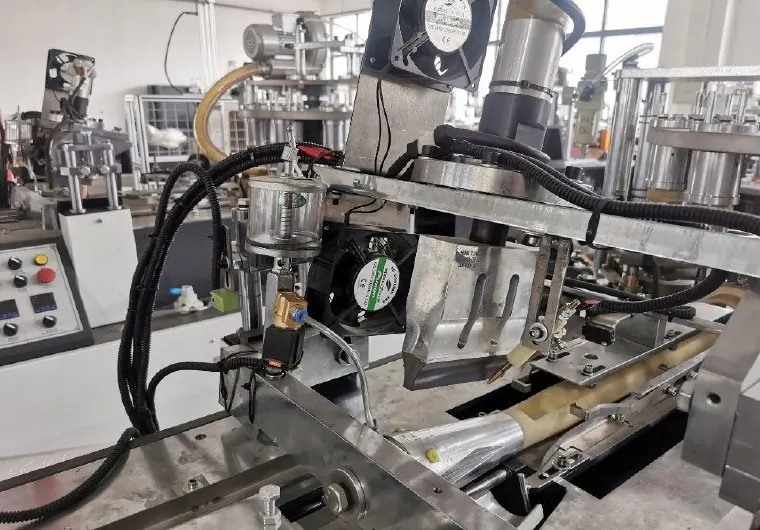
Classify the rim defect before touching the machine
Collect cups in cycle order and mark the machine, cup format, material lot, cavity or station reference, speed state and time. Separate defects into useful categories: incomplete curl, split edge, flattened area, waviness, out-of-round rim, changing curl diameter, surface marking or a defect that repeats at one angular position. Keep both acceptable and defective samples.
The rim curl formation and quality inspection guide explains the product checks. This troubleshooting guide uses those observations to locate a machine or process cause. A lid-fit complaint, for example, should first be separated from a visible rim-forming defect and from a lid specification mismatch.
Build a station evidence table
| Observed pattern | Evidence to inspect | Diagnostic direction |
|---|---|---|
| Defect at one angular position | Mark cup seam and defect location; compare several consecutive cups | Check seam thickness, local support, tooling damage or repeatable contact |
| Rim varies around the full circumference | Cup roundness, body taper, presentation height and tooling cleanliness | Separate unstable cup geometry from a local tool problem |
| Good at low speed, poor after acceleration | Cycle video, cup seating, motion completion and vibration evidence | Review timing, support, looseness and process margin |
| Defect begins with a new material lot | Blank dimensions, edge condition, paper identity and moisture history | Run a controlled material comparison before machine adjustment |
| Progressive marking or splitting | Tool surface, contamination, burrs, heat and wear trend | Inspect under safe isolation and compare with the approved reference |
| Intermittent missed curl | Sensor state, cup arrival, seating and upstream transfer sequence | Confirm the cup reached the station correctly before changing the tool |
Confirm the cup entering the curl station is stable
Inspect the cup immediately before rim curling. Check sidewall overlap, body roundness, height, taper, top-edge continuity and whether the cup is fully seated in its carrier or support. A cup body that arrives tilted, oval or at inconsistent height cannot receive a uniform curling action. Trace the first point where the geometry changes rather than treating the final station as the only cause.
Compare the sidewall fan blank with the approved drawing and retain the material label. An edge damaged during cutting, storage or feeding may split when formed. If the defect follows the side seam, review the seam construction and angular position. Use a known accepted material lot for a controlled comparison; do not mix changes to material, speed and tooling in the same trial.
Inspect tooling, support and mechanical references safely
Apply lockout and the machine supplier’s procedure before entering a guarded forming area. Clean the curl tooling using the approved method, then inspect contact surfaces for adhered paper, coating residue, scratches, burrs, uneven wear or looseness. Check that tool identity matches the cup format and that retained reference marks have not moved.
Inspect the cup support and any guides that control entry and exit. A displaced carrier, loose fastener, worn guide or obstruction can change the cup’s presentation without obvious damage to the curling tool. Do not polish, grind, shim or re-machine a forming surface without engineering approval; an irreversible correction based on the wrong diagnosis can damage the entire tooling set.
Use timing evidence instead of trial-and-error adjustment
From outside the guarded area, record a short slow-motion video where site rules allow. Compare cup arrival, seating, curling motion, dwell and release with a known good reference. Determine whether the tool acts on a fully positioned cup and whether the cup remains supported until the forming movement has cleared.
If a timing or station-reference issue is suspected, follow the delivered manual and the chain, cam and drive timing maintenance guide. Never advance one mechanism by hand while another axis can move unexpectedly. Mark the original position before an authorized adjustment and change only one documented variable at a time.
Control the trial and prove product function
After correcting a verified cause, restore guards, remove tools and use the approved restart sequence. Run a small, identified sample at the permitted setup condition, then increase through authorized stages. Record the number of consecutive acceptable cups, not only the best cup from the trial.
Release requires more than visual appearance. Verify rim continuity, roundness, applicable controlled dimensions, cup stacking and the intended lid interaction where a lid is part of the product. Retain samples from the start, middle and end of the confirmation run and link them to the machine setting and material lot.
Frequently asked questions
Does an uneven rim always mean the rim curling tool is misaligned?
No. An oval body, inconsistent presentation height, side-seam variation, damaged blank edge, unstable support or transfer timing can all produce an uneven curl. Inspect the cup before and during entry to the station first.
Can production staff increase pressure until the rim looks complete?
Not safely as a general method. Excess or unverified forming load can mark the paper, accelerate tool wear or conceal a presentation problem. Use only the approved adjustment method and documented reference for the delivered machine.
Why can rim splitting begin after a paper change?
Edge quality, paper construction, coating, moisture history, blank dimensions and seam behavior may change between lots. Preserve labels and compare a controlled accepted lot before concluding that the machine moved.
What evidence should be sent to the machine supplier?
Send the machine model, cup drawing, tooling identity, material label, marked good and bad cup photos, the angular relationship to the seam, a safe cycle video, the first alarm if any and a list of recent adjustments.
Send the machine model, cup dimensions, material and coating, tooling reference, defect samples and a safe cycle video through our inquiry page. HANNAI can review the evidence against the delivered configuration and discuss the next controlled check.