A temperature display that moves in the wrong direction, drifts after a cable repair or disagrees with the process can come from thermocouple type or polarity errors rather than the heater itself. A paper cup machine may use several heating zones, so every probe, cable and controller input must remain tied to the correct zone.
Thermocouple work combines low-level measurement signals with powered heater circuits. Isolate the machine and use qualified electrical personnel. The approved machine schematic and the installed component data take priority over general color conventions, which vary by standard and manufacturer.
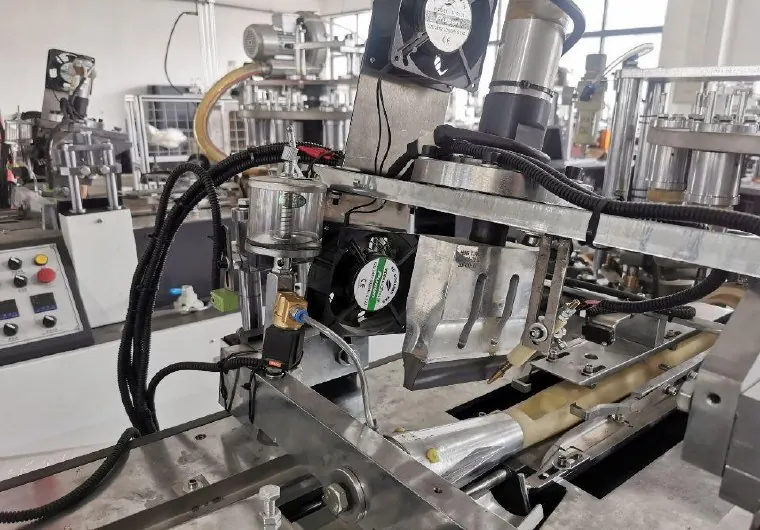
Decision matrix
| Check | Record | Risk if missed |
|---|---|---|
| Sensor type | Type letter and usable range from the installed data | Different types generate different voltage-temperature relationships |
| Polarity | Positive and negative conductor at probe, connector and input | Reversal can produce misleading direction or offset |
| Extension cable | Thermocouple-compatible extension grade and type | Ordinary copper cable adds unintended junctions |
| Junction and sheath | Grounded, ungrounded or exposed; diameter and insertion | Response and electrical noise behavior can change |
| Zone identity | Probe tag, heater tag and controller input | A crossed zone can make tuning appear unstable |
Map the complete measurement loop
Trace one zone from probe tip to terminal, extension cable, plug and controller input. Mark every joint and compare it with the electrical drawing. Do not swap two channels just because their displayed temperatures look similar when the machine is cold.
Record the controller input configuration as well as the probe type. A controller set for a different thermocouple, resistance sensor or analog input can display a plausible but incorrect value.
Confirm type and polarity from reliable markings
Use the probe label, cable printing, connector marking and manufacturer data. Conductor color can support identification only after the governing standard is known. A magnet test or conductor appearance is not a substitute for documentation.
Omega instructions emphasize using thermocouple and extension wire that conforms to the specified thermocouple type. Keep each compatible alloy through the extension circuit, and use matching thermocouple connectors where disconnects are required.
Inspect installation, grounding and routing
Confirm insertion depth and mechanical contact against the approved setup. A loose probe, damaged sheath or air gap can make the controller read the local air rather than the tool. Keep low-level sensor cable separated from motor, heater and switching conductors where the design allows.
Do not automatically ground or unground a junction to cure noise. Match the original sensor construction and controller isolation design. Investigate shielding termination, loose protective earth connections and switched-load interference as a documented system.
Use a controlled heating response test
From a safe cold state, apply heat to one authorized zone and confirm that only its assigned reading rises smoothly. Compare the trend with a suitable independent reference at a defined location; surface and embedded measurements need not be identical, so compare repeatability and direction, not an assumed exact match.
Stop if the display falls during heating, jumps abruptly, saturates, or follows another zone. Do not compensate for a wiring fault by changing controller offset. After repair, return tuning and alarm parameters to their approved values.
Close the repair with traceable records
Record probe type, sheath dimensions, cable type, polarity at each termination, controller channel and response test. Photograph final terminal labels before closing the cabinet.
If a heater problem remains after the measurement loop is proven, continue with the linked contact-inspection guide. Provide the machine model, zone identification, installed part data and temperature trend when asking HANNAI to review a replacement.
Technical references
- Omega thermocouple instruction reference — used for the general component principle; the installed machine documentation remains controlling.
Related machine and guide
Review the HN-M100 paper cup machine for machine context, then use the heater band and thermocouple contact guide for the adjacent maintenance or process check. Browse all Buyer Guides when building a wider project checklist.
Frequently asked questions
Can ordinary copper wire extend a thermocouple?
It should not be assumed suitable. Use the specified thermocouple or compatible extension cable for the sensor type and temperature range.
Can wire color alone identify polarity?
No. Color codes differ by standard; verify labels, markings and manufacturer documentation.
Should controller offset correct a reversed thermocouple?
No. Correct the type, polarity, connection and installation before considering a documented calibration offset.
What should a replacement request include?
Include probe type, sheath and lead dimensions, junction construction, connector, cable length, zone, controller model and photos.
Review your machine configuration with HANNAI
Send the machine model, cup or material drawings, component labels, photos and a description of the required result. We will clarify which details must be confirmed before a quotation or technical recommendation.