Paper cup machine bottom paper feed, punch and transfer troubleshooting should follow the material from the reel or supplied stock to the formed cup base. A bottom defect may begin with paper identity, unwind control, tracking, indexed feed, cutting condition, blank release or transfer position, so changing the final forming station alone may not correct the cause.
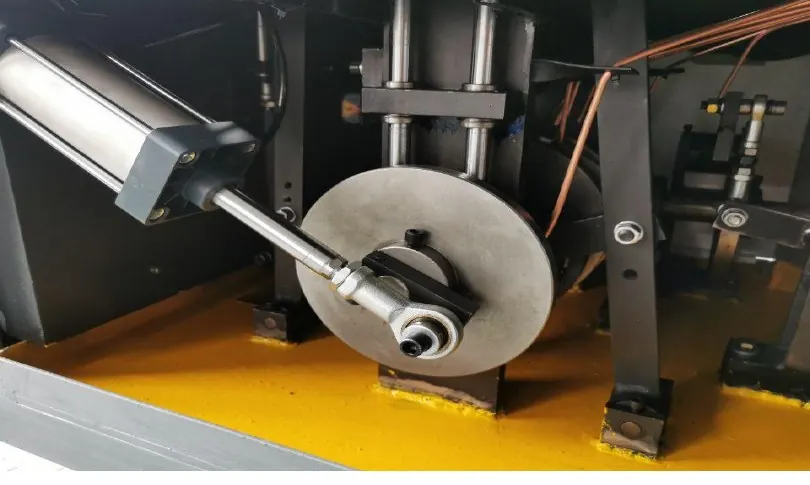
Map the delivered bottom-paper path before adjusting it
Identify the approved bottom material, coating orientation, reel or stock format, unwind point, guide path, feed mechanism, index reference, punch or cutter, waste path and transfer method. Some configurations use roll-fed stock and an integrated punch, while other arrangements may differ. The supplied manual and machine drawing control the inspection.
Mark the normal material path and station references on a controlled setup sheet. This prevents a team from treating feed drift, an incomplete cut and an off-center transfer as one undefined “bottom problem.”
Build a bottom-feed evidence table
| Process point | Evidence to record | Decision question |
|---|---|---|
| Material release | Paper specification, coating side, width, thickness or GSM reference, batch and storage state | Is the approved bottom stock loaded correctly? |
| Unwind | Reel direction, centering, brake or tension condition and edge behavior | Does material enter the guide path without skew or uncontrolled slack? |
| Indexed feed | Feed mark, commanded step, actual position and repeatability | Is the correct length presented for every cycle? |
| Punch or cut | Cut completeness, edge condition, scrap pattern and tooling cleanliness | Is the bottom blank separated cleanly without distortion? |
| Blank release | Sticking, double blank, retained scrap or incomplete ejection | Does one usable blank leave the tool each cycle? |
| Transfer | Blank orientation, pickup/release state, destination position and sensor evidence | Does the blank arrive centered and at the correct sequence point? |
| Finished base | Bottom position, knurl or seal appearance, leakage evidence and retained sample | Does the cup meet the approved base-quality plan? |
Start with material identity and reel loading
Confirm the bottom paper against the approved specification and production order. Record batch, coating orientation, reel width, visible edge damage, telescoping, moisture exposure, contamination and storage condition. A reel that is crushed or loaded in the wrong direction can create tracking and cutting symptoms before the material reaches the punch.
The bottom roll slitting and feeding preparation guide provides the upstream release checks. Do not compensate for incorrect stock by moving machine references.
Inspect unwind tension, centering and the guide path
Observe the reel edge and web path from outside the guarded area. Look for slack loops, edge wandering, wrinkles, rubbing, rapid tension changes, contamination or a guide that does not match its controlled position. Compare behavior during startup, steady cycling, deceleration and restart.
Inspect the reel support, brake or drag arrangement, guides and feed surfaces under approved isolation. Use the machine’s documented setup method; an arbitrary increase in drag can overload the feed, stretch or mark material and make indexing less stable.
Separate feed-length error from punch-position error
Place approved reference marks only where the procedure permits, then compare the material position before the punch over repeated cycles. If the index changes before cutting, investigate feed grip, contamination, web tension, sensor or command evidence and mechanical transmission. If the feed is repeatable but the cut position is wrong, review the approved tooling and station references.
Do not change feed length and tool position together. One controlled variable and labelled samples are needed to show which correction changed the result. Where the feed is coordinated with other axes, preserve the synchronization evidence before changing motion settings.
Evaluate punch condition through the cut and scrap
Inspect both the usable bottom blank and the remaining web or scrap. Incomplete separation, fiber pull, burrs, deformation, double cuts or an unusual scrap pattern can point to contamination, wear, alignment, support condition or unsuitable material. Use the approved tooling inspection method and replacement criteria.
The punch, cutter and nearby drive can contain sharp edges, stored pneumatic force and unexpected motion. Never reach into the cutting area, clear a jam by hand or defeat a guard. Lockout, stored-energy release and tooling work must follow the site procedure and be performed by authorized personnel.
Trace blank release and transfer as separate events
A cleanly cut blank can still stick in the tool, travel with scrap, release twice, rotate or arrive off center. Record the blank’s position immediately after cutting, at pickup, during transfer and at the destination. Review approved vacuum, air, gripper, guide or transfer components only where they are fitted on the delivered machine.
Compare physical blank position with the controller or sensor indication. The sensor and interlock troubleshooting guide helps separate a missing blank from an incorrect detection state. Mechanical timing questions should be checked against the chain, cam and drive timing guide.
Connect transfer evidence to the finished cup base
Retain labelled samples showing the bottom blank before use and the resulting cup. Inspect bottom position, symmetry, fold or knurl appearance, seal evidence and the defined leakage result. An off-center or damaged blank may produce a later defect even when the feed station no longer shows a jam.
Use the bottom knurling and base seal inspection guide to connect machine evidence to product acceptance. Do not increase heat, pressure or forming force until material presentation and transfer position have been verified.
Release the machine through repeated controlled cycles
After an authorized correction, restore guards, clear tools and scrap, verify personnel position and follow the approved restart sequence. Observe repeated feed, cut, release and transfer cycles at the permitted test conditions. Check both the start of the test and later samples because drift may develop after the reel or mechanism moves.
For a machine such as the HN-M100 automatic paper cup machine, tooling, feed and transfer details remain project and cup-format dependent. Release production only when machine behavior and the finished base meet the approved criteria.
Frequently asked questions
Does an off-center cup bottom always mean the punch is misaligned?
No. Reel tracking, indexed feed, blank release, pickup, rotation, transfer timing or the destination reference can move the blank. Locate the first process point where position becomes abnormal.
Can more unwind tension stop bottom-paper wandering?
Not automatically. Excess drag can overload the feed or deform material. Confirm reel condition, centering, guides, brake arrangement and the documented tension method before any authorized change.
What should be retained after an intermittent punch fault?
Keep labelled bottom stock, the cut blank, surrounding scrap and affected finished cups where the quality plan permits. Add the time, machine state, alarm, reel batch and photos of the web path.
When should bottom-feed troubleshooting stop for supplier review?
Escalate when the issue involves undocumented feed or synchronization parameters, punch alignment, damaged tooling, repeated transfer collision, protected logic or a condition the factory cannot inspect safely using the supplied documents.
Send the machine model, cup drawing, bottom-paper specification and batch, reel-path photos, alarm evidence, short event video, cut blank, scrap and finished-base photos through our inquiry page. HANNAI can review the process evidence and discuss configuration-dependent checks.