Paper cup bottom knurling and base-seal inspection links approved materials, bottom formation, visual evidence and controlled functional testing before cups are released.
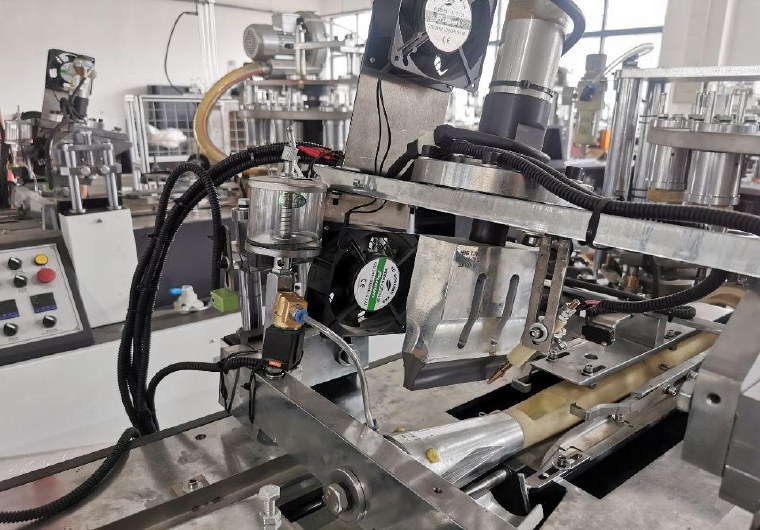
Control the bottom as a complete formed joint
The cup bottom combines the sidewall body, bottom piece, material structure, heat or other sealing action, folding and knurling conditions. Its appearance and performance can influence leakage resistance, standing stability and the customer’s acceptance of the finished cup.
Do not treat one visible knurl pattern as universal proof of a good seal. The required profile, measurements and test results depend on the approved cup, paper, coating, tooling, machine configuration and customer requirement.
Build a bottom-seal inspection table
| Control point | Evidence to inspect | Decision question |
|---|---|---|
| Input identity | Fan blank, bottom paper, batches, coating and drawing | Are the approved materials being used? |
| Bottom placement | Position, centering and relationship to cup body | Is the bottom formed in the intended location? |
| Knurl condition | Continuity, uniformity, folds, cuts, loose areas or damage | Does the visible profile meet the controlled reference? |
| Base geometry | Shape, standing condition and defined dimensions | Can the cup proceed to functional testing? |
| Functional result | Approved leakage or use-simulation method | Does the sample meet the specified test? |
| Sampling record | Machine, mould, material batches, time and approver | Is the production window traceable? |
| Change review | Material, tooling, repair or controlled-setting change | Is renewed approval required? |
Confirm fan blank and bottom-paper identity
Check the cup SKU, drawing revision, fan blank, bottom-paper roll or pieces, paper structure, coating and material batches before evaluating the machine. Incorrect width, condition or identity can create bottom evidence that resembles an equipment problem.
The bottom roll slitting and feeding guide explains incoming-roll checks, preparation, staging and first-good approval. Keep material labels linked to the produced cups so a suspect batch can be traced.
Inspect placement and visible knurl condition
Look around the complete bottom joint. Check the position of the bottom piece, continuity of the formed area, local loose sections, folds, cuts, cracks, contamination, excessive marks, uneven evidence or deformation defined by the quality plan.
Record abnormal position relative to the side seam when useful. Do not decide that a deeper or more visible pattern is automatically better; excessive deformation can be abnormal, while a visually subtle condition may still meet an approved test. Compare against the controlled sample and instruction.
Check base shape and standing condition
Place the cup on the specified flat reference surface and observe the required stability or geometry without pressing it into position. Check for obvious distortion, rocking or a bottom profile that does not match the approved cup.
If measurements are required, define the tool, support method, locations and acceptance limits. Paper products can deform under handling, so inspectors should use a repeatable method and avoid creating damage during the check.
Use a controlled leakage method
A functional test should define the liquid or medium, fill condition, temperature where relevant, conditioning time, observation period, sample quantity and failure boundary. These details must come from the approved product and customer requirements rather than an arbitrary online value.
The paper cup leakage and quality checklist helps examine the side seam, bottom, rim, material and test method together. A leak near the base is evidence to investigate, not automatic proof of one root cause.
Sample across the real production window
Check first-good cups before normal production release and continue with the risk-based sampling plan. Add samples after a bottom-paper batch change, relevant material change, mould or knurling-area intervention, extended stop, restart or repeated feed disturbance.
Record the machine, mould, cup SKU, fan and bottom-paper batches, time, sample location and approver. This evidence defines the last accepted cup and the first abnormal production window when containment is needed.
Investigate related variables systematically
When bottom condition drifts, compare material identity and storage, bottom-piece preparation, feeding, forming alignment, tooling cleanliness and condition, approved machine settings and inspection method. Avoid changing several settings at once, because that makes the result difficult to interpret.
Only qualified personnel should make controlled adjustments or enter guarded equipment areas. If a new setting or material becomes the production reference, use the production change control guide to document evaluation and approval.
Contain suspect cups and retain samples
Stop release according to authority, segregate the affected output and identify related fan and bottom-paper batches. Preserve representative accepted and abnormal cups before destructive tests remove useful evidence.
Record measurements, functional-test conditions, photographs and relevant machine observations. The defect classification and containment guide supports consistent disposition. Equipment such as the HN-M100 must still be configured and approved for the buyer’s actual cup and material.
Frequently asked questions
Does a uniform-looking knurl prove that the cup will not leak?
No. Visual evidence is useful, but release may also require the approved dimensional and functional test for the product.
Is every leak near the cup bottom caused by the knurling station?
No. Bottom-paper identity, coating, placement, forming, sidewall condition and the test method can also influence the result.
Can one bottom-seal setting be copied to every cup size?
No. Use only the qualified procedure and settings for the actual cup, material, tooling and installed machine configuration.
When should bottom approval be repeated?
Review relevant changes to paper, coating, bottom preparation, mould, tooling, repaired parts, machine settings or the test method and document the decision.
Send your cup drawing or sample, fan and bottom-paper details, coating, target output and destination through our inquiry page. HANNAI can discuss forming configuration and project trial information.