Paper cup sidewall seam inspection controls blank identity, overlap position, sealing appearance and functional evidence before normal production or shipment is released.
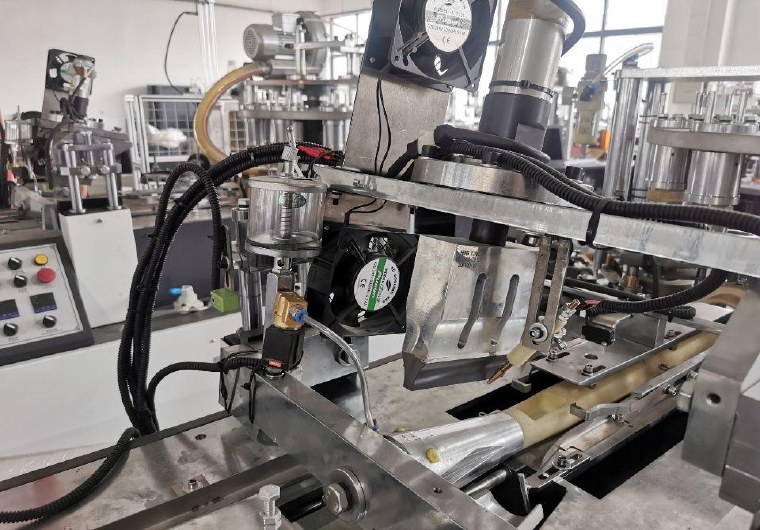
Inspect the seam as a controlled product feature
The sidewall seam joins the fan blank into the formed cup body. Its position and condition can influence appearance, cup geometry, handling and the functional checks required for the product.
Do not reduce approval to one visual sign or one machine setting. Control the blank, material, forming configuration, sealing method, inspection procedure and release authority as one system.
Build a seam inspection and release table
| Control point | Evidence to inspect | Decision question |
|---|---|---|
| Product identity | Cup SKU, drawing, material, artwork and blank batch | Is the correct combination being formed? |
| Seam position | Orientation, top/bottom relationship and approved reference | Is the seam located as intended? |
| Overlap condition | Continuity, alignment and project-specific measurement | Does the sample meet the controlled drawing? |
| Surface appearance | Gaps, lifting, scorching, contamination, wrinkles or damage | Is any abnormal evidence present? |
| Cup geometry | Shape, rim, bottom and seam-related deformation | Can the cup proceed to functional checks? |
| Functional result | Approved leakage, opening or other project test | Does the cup meet the specified use requirement? |
| Sampling record | Machine, mould, material batch, time and approver | Is the affected production window traceable? |
| Change review | Blank, material, tooling, settings or sealing-method change | Is new approval required? |
Start with the approved blank and material
Confirm the fan-blank profile, seam areas, coating structure, printing orientation and material batch before evaluating machine conditions. A wrong or damaged blank can create seam evidence that resembles a setup problem.
Use the sidewall fan blank inspection guide to control the incoming and feeder handoff. Keep the approved drawing, material specification and reference sample available at the line.
Verify position and overlap against the project drawing
Check where the seam appears relative to the artwork, rim and bottom. Confirm that the overlap is continuous and aligned using the measurement method and limits defined for the actual cup.
There is no safe universal overlap value for every material, cup or forming process. Record the sample orientation and measurement points so operators and inspectors can compare results consistently.
Classify visible seam evidence consistently
Inspect for open areas, lifting edges, wrinkles, folds, contamination, unexpected marks, excessive heat evidence, local damage or seam-related distortion. Define defect names and reference photos that match the factory’s approved quality plan.
A photograph supports communication but does not prove bond performance. Preserve the cup and identify its production position when a later functional or supplier investigation may be required.
Respect the selected sealing method
Ultrasonic and hot-air systems use different process principles and can show different normal or abnormal evidence. Apply only the supplier-approved procedure and project settings for the installed configuration.
The ultrasonic versus hot-air sealing guide explains buyer-level method differences. Operators should never copy temperature, power, pressure or timing values from another machine or material.
Combine visual and functional checks
Visual inspection can locate obvious seam conditions, but product release may also require leakage, opening, handling or other customer-defined checks. Use the approved test method, conditioning and acceptance boundary.
A failed leak test does not automatically prove the side seam is responsible, because the bottom, rim, material or test method can also affect results. The paper cup leakage checklist helps investigate the complete cup before assigning a cause.
Sample across starts, stops and changes
Inspect first-good cups and continue according to the risk-based sampling plan. Add checks after a material or blank batch change, mould intervention, relevant setting change, extended stop, restart or repeated feeder interruption.
Record machine, mould, batch, time, sample position and approver. The quality inspection and sampling guide shows how to define the last acceptable and first abnormal production window.
Control adjustments and repeated seam drift
When seam position or appearance moves, compare the blank, feeder, forming condition, sealing system and machine condition before changing several settings. Only qualified personnel should work inside guarded areas or modify controlled parameters.
If a new setting becomes the production reference, document its approval through the production change control process. Repeated informal adjustments hide the source of instability.
Contain suspect cups and preserve evidence
Stop release according to the authorized procedure, segregate the affected output and identify related blank and material batches. Preserve good and abnormal comparison samples, inspection records and relevant machine evidence.
Use the defect classification and containment guide for disposition and escalation. For configurations such as the HN-M100 paper cup machine, final seam and forming requirements still depend on the confirmed cup and material.
Frequently asked questions
Can sidewall seam quality be approved by appearance alone?
Not always. Use the visual, dimensional and functional evidence required by the approved cup, customer and quality plan.
Does a wider visible overlap always make a stronger seam?
No. Overlap must match the controlled cup design and forming process. A visual width alone does not prove sealing performance.
Is every cup leak caused by the sidewall seam?
No. Bottom formation, material, rim condition and the test method can also affect the result. Inspect the complete cup before assigning the cause.
When should seam approval be repeated?
Review relevant changes to the blank, material, supplier, mould, sealing system, settings or repaired components and document the release decision.
Send your cup drawing or sample, paper structure, required sealing method, target output and destination through our inquiry page. HANNAI can discuss forming-machine and seam-control considerations.