Paper cup machine tooling life should be planned from condition evidence, cup-quality trends and replacement lead time instead of one universal production-cycle number.
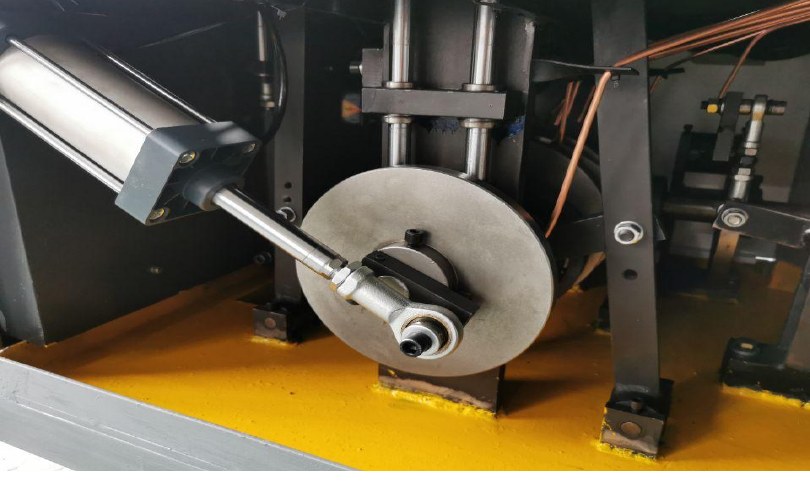
Manage tooling as a controlled production asset
Moulds and change parts help determine cup dimensions, forming condition and repeatability. Their useful life can vary with machine design, component material, cup specification, paper properties, setup, cleaning, maintenance and operating conditions. A fixed replacement interval copied from another project may be too early or too late.
Buyers should agree how tooling is identified, inspected, stored and replaced for the confirmed machine. Only qualified personnel should inspect or change technical parts, following the manufacturer’s instructions and the factory’s safety and isolation procedures.
Build a condition-based planning table
| Tooling group | Condition evidence | Planning action |
|---|---|---|
| Forming mould parts | Measured condition, surface damage and cup dimensional trend | Record baseline, inspection method and approved replacement trigger |
| Bottom-forming or knurling parts | Bottom-seal quality, marking, wear or repeated adjustment | Investigate the system cause and plan matched replacement where specified |
| Rim or curling parts | Rim shape, smoothness, consistency and physical condition | Compare with approved samples and supplier limits |
| Feed guides and product-contact change parts | Tracking, contact marks, looseness or setup instability | Inspect alignment and condition before assuming normal wear |
| Cutting or wear surfaces where fitted | Edge condition, burrs, debris and output trend | Use the machine-specific service method and qualified personnel |
| Fixtures, gauges and setup references | Damage, calibration status and repeatability | Protect, identify and verify before they guide tooling decisions |
Separate tooling from general spare parts
Tooling and change parts are often tied to a particular cup size or specification. General spares may instead support motion, electrical, pneumatic or routine wear functions across several products. The buyer should keep both categories in the asset system but avoid mixing their identities and stocking rules.
The mould changeover guide explains product-specific setup control, while the spare-parts checklist covers broader inventory planning.
Create an acceptance baseline
At factory acceptance or first approved production, record the tooling identity, cup specification, relevant setup reference and first-good samples. Where the supplier defines approved measurements or visual inspection points, record those methods and initial results.
Photographs can help show surface condition and assembly orientation, but they do not replace controlled dimensions, supplier references or approved physical samples. Use the sample approval checklist to connect tooling condition with accepted cup evidence.
Use cup-quality trends as an early signal
Monitor recurring defects, dimensional movement, seal appearance, rim condition, machine adjustments and reject patterns by SKU and tooling set. A gradual change can justify inspection before an abrupt failure interrupts production.
A cup symptom does not prove that tooling is the root cause. Material, temperature, pressure, alignment, contamination, utilities and operating settings may produce similar evidence. Use the defect classification and containment guide to protect affected product while the cause is investigated.
Inspect condition with repeatable methods
Define the inspection point, cleaning condition, measuring tool, reference and responsible qualified role. Record actual observations rather than only “good” or “worn.” Use the manufacturer’s approved method because uncontrolled measurement can damage a surface or produce misleading results.
Inspection frequency should reflect risk, experience and observed trend. Increase attention after abnormal contact, jams, quality movement, a new material or an unexpected adjustment history.
Track operating context, not only quantity
Production count is useful when it is linked to the correct tooling set, cup specification and time period. Also record material changes, significant stops, maintenance, cleaning, adjustment and abnormal events. Two tooling sets with the same count may have experienced very different conditions.
Use a controlled production record so the accumulated evidence remains comparable across shifts.
Define replacement triggers before failure
A replacement trigger may combine supplier limits, measured condition, confirmed cup-quality trend, inability to hold an approved setup or evidence of damage. State who can approve continued use, repair or replacement.
Do not publish one universal tooling-life promise for every machine and product. Request configuration-specific guidance from the supplier and refine the factory’s planning threshold with controlled operating history.
Plan stock from risk and lead time
For each critical tooling item, record supplier reference, machine and SKU compatibility, quantity in service, quantity available, procurement lead time, inspection status and storage location. Consider whether parts must be replaced as matched sets or require supplier fitting.
Order planning should leave time for incoming inspection, installation and first-good approval. A spare in storage is not production-ready when its identity or condition is unknown.
Protect tooling during storage and handling
Clean with the approved method, dry where required, protect working surfaces and use dedicated labeled locations. Prevent tools from contacting each other or being stacked in ways that can damage edges and reference surfaces.
Record removal reason and condition before storage. A used set awaiting investigation should not be returned to the available-stock location.
Control replacement and first-good approval
Before replacement, confirm machine isolation, part identity, tooling set, approved procedure and required inspection tools. After installation, complete the defined setup checks and produce a controlled sample. Quality should approve the first good product before normal output is released.
Record the removed part, reason, findings, new part identity, setup result and approval. This history improves later life planning and helps distinguish natural wear from alignment, contamination or handling problems.
Review unexpected wear as a system issue
When a tool fails or deteriorates earlier than expected, do not replace it repeatedly without investigating. Check installation, mating parts, material, cleaning, lubrication where applicable, settings, machine condition and the defect timeline.
Feed the confirmed cause into maintenance, training, storage and purchasing controls. The purpose of the life record is not only forecasting; it is also preventing repeat loss.
Frequently asked questions
How many cups should paper cup machine tooling produce?
There is no reliable universal number. Useful life depends on the confirmed tooling, cup, material, setup, maintenance and operating conditions.
Should tooling be replaced only after cup defects appear?
No. Combine scheduled condition inspection, measured trends, adjustment history and quality evidence so replacement can be planned before failure.
Can a damaged tool be repaired?
Only when the supplier or qualified technical authority approves the repair method and verifies that the restored condition meets the required specification.
What should be recorded after tooling replacement?
Record old and new identities, removal reason, condition findings, setup reference, first-good result, approver and any follow-up action.
Send your cup drawings, material, SKU range, expected schedule and spare-tooling needs through our inquiry page. HANNAI can discuss tooling scope for the proposed machine configuration.