Paper cup machine bottom knurling station troubleshooting must connect the finished base defect to bottom-paper preparation, cup-body geometry, heat delivery, tooling position and cycle sequence. A leaking or visibly weak base is not proof that one temperature or pressure setting is wrong. Professional diagnosis isolates the first abnormal condition and preserves the approved machine references.
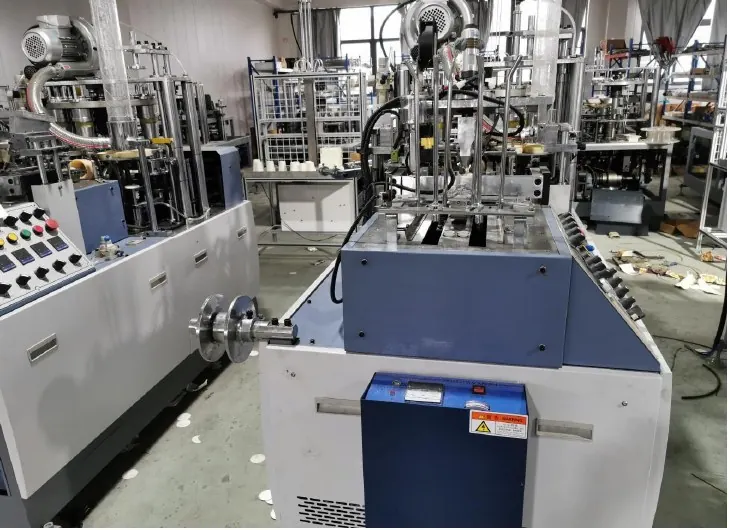
Separate the defect by location and failure mode
Keep cups in production order and mark the side seam before testing. Record whether the issue is a channel leak, incomplete knurl, crushed band, scorched area, wrinkled bottom, loose bottom disk, damaged coating or variable base height. Note whether the defect repeats near the side seam, at one angular position or around the full circumference.
Use a controlled test method and the bottom knurling and base seal inspection guide to distinguish a cosmetic mark from a functional seal failure. Do not rely on an uncontrolled squeeze or one isolated cup, because it does not reveal whether the process is drifting.
Use an evidence table before changing settings
| Check point | Evidence to capture | Question to answer |
|---|---|---|
| Defect map | Marked cup, seam position, leak position and several consecutive samples | Is the failure local, circumferential or intermittent? |
| Bottom blank | Diameter, edge, coating side, forming history and material lot | Does the disk match the approved cup and arrive undamaged? |
| Cup presentation | Body roundness, bottom insertion depth and station seating | Is the assembly centered and fully supported? |
| Heat delivery | Actual diagnostic indication, airflow condition and warm-up state | Is the delivered heating system stable and correctly directed? |
| Knurl tooling | Identity, cleanliness, surface condition, reference position and wear | Can the matched tooling apply a uniform forming action? |
| Cycle sequence | Arrival, heating, forming, dwell and release timing | Does each action occur on a correctly positioned cup? |
Verify bottom-paper preparation and insertion first
Check bottom-roll identity, coating orientation, slit width and the condition of the punched disk. Inspect for curled edges, fibres, contamination, double feeding or damage during transfer. Confirm the disk is centered and inserted to the intended position before the knurling action. The bottom-paper feed, punch and transfer troubleshooting guide provides the upstream diagnostic sequence.
A correct knurling station cannot compensate consistently for the wrong disk diameter or unstable insertion. If one material lot produces defects and a controlled accepted lot does not, preserve both labels and compare the supplied paper and coating records before changing the machine.
Evaluate heat as a delivered system
HANNAI paper cup machine configurations may use hot-air or hot-blast support for bottom knurling, depending on the delivered model. Confirm the actual heater, air path, sensor, controller and recipe for the machine rather than copying an online temperature. Inspect warm-up completion, airflow obstruction, nozzle condition and any alarm or recent component replacement.
Only qualified personnel should inspect energized heating circuits. Hot surfaces, stored energy and unexpected motion remain hazards after a normal stop. Do not increase temperature to conceal a blocked air path, damaged sensor, incorrect material or mechanical misalignment. The heating and temperature control guide explains how to preserve a reference and stage authorized changes.
Inspect knurl tooling and support under isolation
After lockout, clean the matched tooling and inspect the knurl pattern, contact band, holder, cup support and fasteners. Look for adhered coating, paper debris, surface damage, uneven wear, looseness or evidence that the cup is not centered. Compare tool identification with the approved cup drawing and changeover record.
A mark that repeats at the same angular position can indicate local tool damage, side-seam interaction, a displaced component or a cup-support issue. A full-circumference weakness may direct attention to heat delivery, forming position, blank size or overall load. Do not grind, shim or re-machine the tooling without supplier approval and a retained original reference.
Check sequence and station synchronization
Observe from outside the guarded area. Determine whether bottom insertion is complete before heating and forming, whether the cup is stable during contact, and whether release occurs after the tool has cleared. Note whether the first defective cup follows a stop, warm restart, speed change, jam, new roll or format change.
If the defect appears only after acceleration, compare heat stability, station completion, cup seating and mechanical vibration at each approved stage. Do not use higher load or broader timing windows to mask a binding mechanism. Inspect the verified mechanical cause and retain all changes in the machine history.
Validate recovery with both process and product evidence
Restart through the approved sequence with guards restored. Produce an identified trial, inspect the bottom profile and use the site’s validated leakage method. Sample consecutive cups through warm-up and steady operation. If the product is intended for a particular filling condition, follow the approved product test rather than inventing a harsher test on the production floor.
Release only after the machine remains stable, the base is visually consistent and the functional test passes across the defined sample. Link the result to cup dimensions, bottom-roll lot, sidewall material lot, tooling identity, recipe reference, operating stage and approver.
Frequently asked questions
Does a leaking bottom prove that more heat is needed?
No. Incorrect disk size, coating orientation, insertion depth, cup centering, blocked airflow, tool contamination, timing or local damage can create the same symptom. Increasing heat before diagnosis may worsen material damage.
Why does the defect often appear near the side seam?
The seam changes local wall thickness and forming geometry. Mark the seam and leak position, then inspect overlap consistency, bottom insertion, tooling support and the delivered forming reference together.
Can one good cup confirm that the repair worked?
No. Use a defined run of consecutive samples across startup and stable production. A single selected cup cannot show whether heat, feeding or alignment remains consistent.
When should the tooling supplier be involved?
Escalate before irreversible tool work, when the tool identity does not match the drawing, when wear or damage is visible, or when a repeatable defect remains after material, insertion, heat and sequence have been verified.
Send the machine model, cup and bottom dimensions, material/coating records, marked defect samples, tooling reference, alarm history and a safe cycle video through our inquiry page. HANNAI can review the evidence and the delivered machine scope.